So, I have this friend. I think you've read about her in my blog (if not, shame on you for not reading the initial posts...do so at your earliest convenience!). Her name is Genesis. She has GREAT creative ideas. And she calls on me to execute them. This project was (SHOCKER) not baby-related! She works at this awesome apartment community and they are doing something pretty cool. They're having a little competition with the other communities in their company. They each get to decorate a wall in one of their models and the best design wins! Genesis enlisted my help with her room, which I've decided to call "Loft in the City." They're creating a chic loft-style space with Atlanta-specific decor. Her community (which I should probably plug here--Mariposa Lofts http://www.livemariposa.com/) is located in the heart of Inman Park in Atlanta. Inman Park is the newest, coolest area in town. And Genesis wanted to convey this cool, hip side of the area in her design. She asked me to create a really big map. Yep. A map. I was just going to paint it on a canvas, but my super-awesome boss had a better idea. She is the epitome of cool, hip and chic and so is all the art in her house. She suggested I print off the map on my laser printer and do a layered collage type deal. So it has dimension and this cool vibe to it. Easier said than done, nanner mom...easier said than done.
What you'll need:
- 48x48 canvas (have fun getting this one home if you don't drive a u-haul truck...I got Gen's husband, Brett to fasten it to the roof of the civic. That was a fun ride home)
- Big old bottle of Mod Podge (the yellow bottle if you want matte or the orange if you want satin finish)
- Two sponge brushes
- A laserjet printer or your choice of images printed off at Kinko's. I use an HP Color LaserJet CP1215. Another awesome gift from my wonderful family! I'm pretty darn lucky! I highly recommend this for all you do-it-at-homers. :)
- Paper cutter
- LaserJet toner...make sure you have enough so you don't have to go back 3 different times...like I did.
- Lifetime Movie Network. There is a plethora of horrible movies on here and I just get sucked in totally!
Anyway, I had fun doing it...here's what I did:
 |
| What is this strange contraption making so much noise? Can I get inside? Is it a toy? |
I created a map on AdobePhotoshop (I know, Illustrator would have been much easier, but my computer has decided to be a bit cantankerous so I made due...) and changed the size to 30x30 and then sectioned it off into 5x5 squares. I next increased the images size to 8x8. Then I printed all 36 of them off and cut off the excess paper.
Then I proceeded to attach them to the canvas (size 48x48) with the Matte finish Mod Podge.
 |
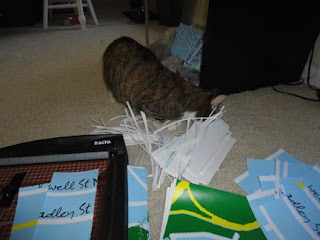
| What? I'm quite comfortable on this pile of paper and scrap fabric and plastic bags. Go away now, please. |
Then I checked on the cat...she was chillin'.
Once I had the first layer done, I went started printing the second layer. I moved the lock guides on my image to make 5x5 squares in different places. I did this so that I could cover some of the seams and imperfections.
 |
| I can camouflage myself in the paper scraps... |
Next, I cut them out. Pain in the butt, if I do say so.
Then I layered the second set and Mod Podge'd them on.
Do that a couple more times and you're done! Total project time: 2 days, but that was only because I had to get more toner and they were closed on Sunday. But, then again, if you add in the time it took me to CREATE the map on the slowest computer on earth, probably more like 3 days, but not continuous ones. Assembly took approximately 3 Lifetime movies. :)
This is the mess I still have to clean up, but don't feel like doing it right now. I had a lot of scraps left over, so maybe print off as necessary so you don't end up wasting a bunch of paper and toner. I think I'll keep these though and try to do something fun with them later. Any ideas are more than welcomed!


BALLER map! Gen's property better win damnit!
ReplyDelete