It's spring break for the Nanners, so I've got one WHOLE week off. What should I do when I have a few days off from watching someone else's kids? I could bake, sew, clean or...go home and help my sister with her kids! Let's do it!
On the road again...
Once I made it safely to Augusta, I hunkered down with the most ADORABLE little guys ever! :) Brody and I took a little trip to Jo-Ann fabric and crafts yesterday because I was in the crafty mood and he's always there. I swear, my sister has done such a great job getting Brody into crafts and art. She's so creative! I knew I had to do something Easter related (although I was tempted to do something golf-related since it's Master's week here, but all I could think of were golf ball cake pops and I need a little break from the baked goods) and it also had to be something fun for a soon-to-be 3-year-old. When in doubt, I shrinky-dink!
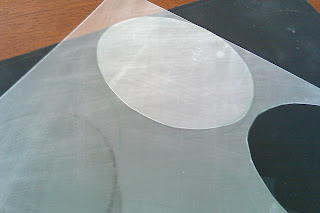
If you've never heard of these before, they rock! I love them. Basically you draw, print, paint your design onto a big transparent sheet of plastic and then stick it in the oven to shrink. It's so cool!
Brody liked the beads at the store so I thought...there must be a way to combine the two...
Presenting the "Hoppy Easter Mini Banner!"
We're going to break this up into two segments: Do During Naptime and Do With the Nugget (that's what I call anyone under 5 years old...they're all little nuggets)
Here we go...supplies:
- Hole Puncher
- Colored Pencils
- Scissors
- Shrinky Dink Paper (any brand) either clear or matte
- Parchment Paper or vellum
- Baking sheet
- Beads
- Some sort of lanyard or ribbon or hefty string to hang things from
- Sharpie
- Sand Paper (only if you purchased the clear paper)
Do During Naptime
First, determine how big you want your eggs to be. Then trace them and cut them out. I accidentally bought the clear paper and colored pencils. These two don't mix so you have to rough up the paper with a bit of 400 grit sandpaper. If you bought matte or if you want to use permanent markers or paints, you can skip this step. Paint would actually have been super fun for Brody but I didn't think about it until we'd left the store already! Oops!
Write your letters on the eggs. In order for them to show up correctly, you have to write them backwards. I did NOT find this easy! I thought I could do it, no sweat, but I guess I'm not quite as quick as I thought I was... I thought I'd go ahead and have this done before Brody woke up so that he didn't have to wait for them to be ready and I could also make sure that they were perfect...I'm kind of a control freak.
Punch holes in the top so that you can hang them from the string. It is very important that you do this before you shrink them!
Do With the Nugget
Once your little ball of energy wakes up, you can have some fun with them! Get out the colored pencils and let them have fun! Make sure they color on the correct side of the egg and that they bear down pretty hard. I had to let go of my controlling nature and let Brody do his thing here. He did a great job though!
Now, preheat the oven to 330 degrees and place a sheet of vellum paper or parchment paper on the baking sheet. Place your eggs on the baking sheet and make sure they don't overlap.
Once the oven is hot, you can put your sheet in there. Brody LOVED watching this. It only takes about 2-3 minutes for them to shrink. It's pretty cool to watch them do it, too. They curl up a bit but eventually flatten out. I so LOVED watching his face light up while they shrank! (and my sister's friend, Helen, enjoyed it too! haha)
After they've stopped shrinking, pull them out. If they're still curled a little, flatten them with a spatula or piece of cardboard. Let them cool.
Tie a knot in the end of the string and start placing some beads on there. I did 5 as spacers between words and 3 in between each letter. I let Brody pick each and every bead. He's very particular so he enjoyed this bit as well. As he handed each one to me, I slid it on. When it came time to place the eggs, I threaded them in the same way each time and tied a knot when it was at the right place so it hung facing forward.
 |
| This is the size difference after they shrink. So CUTE! |
Keep going until you're finished. Tie a loop at the each end of the string and you're ready to hang it up! :)
I know this isn't fine art or anything that ground breaking, but it was fun and kid-friendly!


