Friday, June 17, 2011

For the love of...US

What a crazy year it’s been…

A little over a year ago, I met the most amazing guy…we went out, we had some dinner, we went to Ikea…we fell in love.


Since then we’ve had about a million adventures and made some really great memories. With Evan’s birthday fast approaching, I wanted to give him something heartfelt and original. Well, maybe not so original…Evan and I recently went to church with my friend Rachel and there was this amazing painting behind the pastor…I might have used that piece as my inspiration, but I definitely made it my own!

What I did was paint the entire canvas red and let it dry. Then I layered different colors top of it with no real rhyme or reason. Finally, I painted a big red heart smack-dab in the center.

While that dried, I sketched out some of the things I wanted to put on our “For the Love of Us” painting. In case you couldn’t tell what really is on there, it’s a year’s worth of inside jokes, things that we’ve done, places we’ve been and a lot of who we are. Evan’s family is from California, mine is from Georgia, we’ve taken quite a few trips this year, we got a dog, we love Ikea…just the usual stuff.

Anyway, after about 3 hours of sketching, I didn’t want to have to re-do all of my pictures, so I decided to use transfer paper and then go over those pictures with sharpie later…

This also allowed me to cut the pictures out and place them where I wanted to and mix it up a bit. So, that’s what I did. After I’d placed all of my important pieces, I realized I had a lot of space left over so I filled in with little phrases we say, tiny little things that only make sense to us.

Now I was planning on giving this to Evan on his actual birthday, but he had to go pick up the pup from my place and I forgot to hide it before I left. Anyway, he saw it way before he was supposed to and now it’s hanging over Evan’s couch. He loved it! (or so he says! Haha)

Wednesday, June 15, 2011

So, as I've been spending quite some time outside with the nanners this summer, I've taken a good hard look at my midsection. We are not pleased. (yes, I'm invoking the royal "we" here...I like to pretend I'm a princess sometimes...get over it.)

It's not that I'm big or even that out of shape, but compared to where I used to be when I was dancing and singing and running around like a mad woman in high school, there is something to be desired. Don't worry, this is not going to be a "Debbie Downer," self-loathing post. Quite the opposite, really.

Seeing so much of my stomach, which has been in hibernation until recently, has made me realize that if I just pay a little attention to what I eat and actually make an attempt to work out every so often, I will be a happier, healthier me.

I've already done a bit of research on exercise that can reduce stress and help me tone up and I've decided to start doing pilates a couple of times a week. That started last night with my friend, Casey and a trip to Target. I honestly felt sore this morning (sad, right?) and it made me feel like keeping up the trend of healthy living.

So I opted for yogurt instead of cupcakes this afternoon and I felt inspired to cook for Evan and myself tonight. Unfortunately, all I had in my freezer were toaster struedels, pizzas and vodka. Not really much you can do with that (although the vodka might replace my glass of wine tonight...what's up Ketel One? It's stress-reduction in a bottle).

Evan saved the day, though. He dashed off to the grocery after work and before tonight's summer storm settled in. When he got back, I started cooking. Here's tonight's somewhat healthy summer meal:

Caprese Chicken and Couscous

Doesn't it look yummy?! :) I love all of these ingredients and I feel like it's pretty healthy.

Ingredients:

  • Chicken Tenderloins (Evan opted for the free-range, organic ones. Do we get double healthy points for that?)
  • Extra Virgin Olive Oil (we got ours in Napa at Lava Vines Vineyard. It is the best stuff ever. Honestly. It's to die for! www.lavavine.com check it out!) 
  • Minced Garlic or whole cloves minced
  • Kosher Sea Salt
  • Pepper
  • Italian Seasoning
  • Fresh Basil
  • Cherry Tomatoes
  • Balsamic Vinegar
  • Couscous (I recommend Near East's Garlic and Olive Oil variety--it's done in 5 minutes!)
Start off by lightly coating the pan in olive oil. Add garlic and basil and sauté. Add salt, pepper, Italian seasoning and balsamic vinegar. Warm for a few minutes.

Salt and pepper chicken before adding into vinegar mixture. Cook over medium heat, flipping a couple of times to make sure it's cooking evenly.

While the chicken is cooking, get started on the couscous. Just follow the directions on the box. If you can't make this stuff...go with the pizza and vodka in the freezer. 

After the couscous has started, halve the cherry tomatoes and throw them in the mix. Stir and flip and add seasoning if you feel it needs a little something extra. 

Add a few pearls of cheese while the pan is still hot. 

When it's all cooked and yummy looking, fluff the couscous and serve it all up. Add a few more pearls of cheese and sprinkle with balsamic vinegar. 

Enjoy! :) I know we did! 

And for dessert? Yeah, I fell for the yoplait commercials and am trying the "dessert" flavors of their light yogurt. Jury's still out on these. 

Welcome to the World, Jaxen Lewis Knight!

First off, I have to say congratulations to my dear friends Danielle and JD on their adorable new addition, Jaxen! That is precisely what this post is about, as well!

JD is in the army and therefore travels quite a bit, so Danielle and JD decided to make Jaxen’s nursery travel-themed! They’ve decided to go with a vintage-map look in brown and navy blue, which is where I started for this piece.

I’d love to say that I made a deliberate decision to use four small canvases, but honestly, I was going to see them the day they came home from the hospital and I just so happened to have four small ones instead of one large one. So that’s what I used. I do feel like it gave it a bit more character than the traditional route. Then again, I think it goes without saying that none of my friends have really been “traditional” when it comes to their nurseries.

Anyway, I started by washing each canvas with a light brown paint and using a hair dryer to dry them quickly. Then I sanded them a bit to give them a more old-world feel. Next came the hard part…the map it self posed quite some problems. I found an old map online and printed it out. Then I used a little trick that Gen’s mom taught me…I laid a grid down on top of the map and used it as a reference guide for where exactly things needed to go on the canvases. (how is it that Gen keeps coming up in my posts? Haha)

Once the basic outline was done, I brushed from the outside in, filling in the shapes with a darker brown. I was hoping to make the edges darker than the middle, but it worked in some ways and not in others. Once that layer was dry, I sanded yet again. Once I was finished with the background of the map, I mixed up a shade of navy blue and wrote Jaxen’s name on the canvases and outlined them all in blue.

Sadly, now I have a large blue stain on my carpet (goodbye security deposit…) thanks to my clumsy puppy!

All in all, I think it turned out rather well! I love giving my friends custom gifts rather than store-bought ones. I feel like I’m passing a piece of my heart on to them and hopefully it will bring love and happiness to those in their lives. Cheesy, right? Well, that’s me!

Congrats, JD and Dani! Thanks for bringing yet ANOTHER boy into our group! Let’s see…that’s number 7, I believe! Maybe we’ll see a girl sometime soon? (And no…I don’t mean from myself. I’d kinda like to get something small and sparkly first! Hint hint…E)

Monday, June 13, 2011

And Puppy makes more...work

It was a normal Saturday afternoon here in Atlanta. Evan and I love festivals and there just so happened to be one of our favorites going on that weekend! 420 Fest is thrown every year by Sweetwater Brewery to celebrate Earth Day (Yeah, it’s been a while since all this happened…Sorry for the delay in updating things! It’s been quite a busy few weeks and I’m just now sitting down to take the time to update things!) and give people a taste of their lovely, delicious beer!


There were SO many adorable couples with their even cuter puppies…and there was also a booth there with puppies for adoption. Rescue Me! Animal Project had a great selection of adorable puppies and kittens and (shocker) I fell in love with one of them.

Note to all boyfriends out there…girlfriend + beer + precious puppies = a really bad idea. Unless you’re totally ready for a commitment with your significant other. One that doesn’t involve a ring, a ceremony, or an exorbitant amount of money, that is. Ok, well an exorbitant amount of money will probably be spent regardless, but yeah. Needless to say, I found the (second) love of my life on this fateful day.

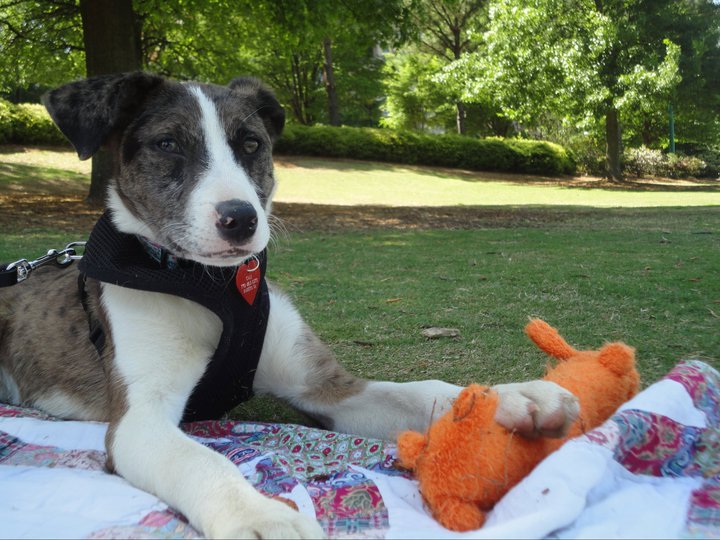
We took Cali to Centennial Park and she was tuckered out!
Have you ever seen the look in an animal’s eyes on those uber depressing Sarah McLaughlin ASPCA commercials that say “love me…all I want is some love and a home. Please love me and take me home with you…” and you either change the channel or sit there eating lots of carbs and crying hysterically? Well, you can’t do that in person. While looking at the bigger dogs, I met with the saddest eyes I’ve ever seen. And I fell in love.

After talking to the Rescue Me! Animal Project people, I found out that what they’re doing is actually really cool. The animals they rescue never go to a shelter. They always keep their available pups with a foster parent until they can find a home. I feel like they are preparing their pups for their future homes. After about an hour of talking to Audrey, the sad-eyed puppy’s foster mom, I decided I had to have this little girl!

Such a happy girl!
A little paperwork, a few giddy calls, a home inspection and a visit to a pet collar boutique booth at the festival (please check out Hollywoof Styles on Etsy!!!), Evan and I had a dog!

Cali's Collar
Thanks to Hollywoof Styles on Etsy.com
I cannot begin to tell you how amazing this puppy is! She has completely changed my life, in all the best ways possible. I never thought I could love an animal so much. I mean, I love my cat. I really do. But she doesn’t give me the unconditional love that Cali (oh, yeah, that’s what we named her!) has given me from the moment she became mine. I get to take her to work with me and she is so amazing with the kids. She is the best thing ever!

Shepp and Cali chillin' on a hot summer day!
In case you're wondering, Cali is a Catahoula mixed with something small (maybe a jack russell? something small and sweet, for sure!). She was kept with her mother and other littermates until the time she came to live with us. She has the best temperment and is nothing short of perfection! 

Anyway, here is the scoop…if you’re looking to adopt, please check out Rescue Me! Animal Project on facebook (https://www.facebook.com/pages/Rescue-Me-Animal-Project/133822049274?ref=ts) and once you’ve got your precious bundle of fur, stop by Hollywoof Styles to accessorize your precious pooch! (http://www.etsy.com/shop/hollywoofstyles?ref=ss_profile) And FYI, they donate a percentage of their proceeds to various animal rescue groups!


PS...Cali's mom, EmmyLou is still available from Rescue Me! Check her out!!

Monday, May 2, 2011

Welcome to the Greatest Show!


What a week it has been! I am so blessed to have been able to celebrate two very important little boys in my life! This weekend, Mr. Evan and I made the trip down to Augusta for my ADORABLE nephews' joint birthday party! First of all, I have to say, my sister is AMAZING! She threw together a really beautiful, classy, FUN circus-themed party for my nephews. She thought of everything! There was so much amazing stuff that I can't even begin to describe it all! Hopefully I can add some pictures later to show you all exactly how amazingly talented she is as an event coordinator.

Until then, I guess I can talk about how awesome I am. Ha...just kidding. But I do want to share the fun cupcakes I made for the boys.
When you think of the circus, the first things that come to mind are clowns, elephants, lions and popcorn. Or at least that's how it is for me. So I decided to start there. Brooke had also wanted to have a "big top" cupcake on the very top of the stand, so that's where I'll begin to explain.

Obviously I made the cupcakes (Kroger brand cake mix- I got cheap and lazy with this) and iced them (Kroger brand vanilla icing) and got started on the fondant.

Have you ever bought fondant? It's expensive. And it tastes like crap. So I wanted to know if there was some way I could make my own and make it tasty. I found the best recipe on Wilton.com for marshmallow fondant. This stuff is so freaking easy! And YUMMY!

What you need:

  • 16 oz mini marshmallows 
  • 2 lbs of confectioner's sugar (powdered sugar)
  • water
  • a microwave-safe bowl
  • a microwave
  • crisco
  • food coloring


Pour those marshmallows into the bowl and put about 2 tbsp of water in there. Nuke 'em! 30 second intervals and stir in between until it's all creamy. Next you're going to want to dump about 3/4 of the bag of sugar into the mix and stir in a bit. When it's got a good enough consistency that you can pull it out, grease down your counter-top and your hands and pull that lump of lovely sugary goodness out and knead it til you think your arms are going to fall off, adding powdered sugar in there to make it a little firmer.

Once you have it fondant-y feeling, you can separate it into balls for each color you need and get to work coloring it. Knead it to death while mixing those colors in. I needed yellow, red, orange, green, blue, grey and white. Guess which one was easiest to make? :)

I had a whole bunch of cookie cutters that I got from Ikea and let me tell you, they saved my life this week! To make the big top, I cut a circle out of both red and yellow then used my mini pizza cutter to make the triangles. Then I put them on top of a third red circle with yellow and red alternating. Note: put a little water on the bottom red one before placing the colored triangles on top and then put a little cornstarch on top and roll out a little bit. You want to mesh them together by doing this. Before you put this on top of the cupcake, make a little icing pyramid and stick it in the freezer for a few to firm it up. Place the "big top" on the cupcake and then make a tiny orange ball for the very very top.

For the lion, you need to roll the orange fondant pretty thick and cut out as many circles as you want (I did 8). I used an exacto knife to cut tiny triangles out of the edge to make the lion's mane. Then you need to roll it out a little bit so it overflows the cupcake liner. Then cut a yellow circle out for his head and tiny half circles for his ears. Roll a little orange ball for his nose.

Elephants! I just free-handed this one. You can figure this one out...

Clowns. This was a hard one for me since I HATE clowns. Terrified of them, really. But anyway, I used a heart cupcake for his hair and free-handed the rest. I had some little eye sprinkles handy that I used for the eyes. Easy-peazy.

For the popcorn, I had to mix some white and yellow together but not mix them up very well. Then I just free-handed some shapes and scrunched them up and attached them to a colored background. Then I cut some white stripes (really thin) and placed them on red fondant and rolled it out. Then I cut some popcorn buckets and attached them on top of the "popcorn" to make these cute little things.

For the stars, polka dots and stripes, I cut out the tiny shapes and placed them on colored bagrounds, rolled them out and cut circles out.

Got it? Good. Now make  100 of those little suckers and You're done! :)

Wednesday, April 6, 2011

Hippity Hop Hippity Hop!

It's spring break for the Nanners, so I've got one WHOLE week off. What should I do when I have a few days off from watching someone else's kids? I could bake, sew, clean or...go home and help my sister with her kids! Let's do it!

On the road again...

Once I made it safely to Augusta, I hunkered down with the most ADORABLE little guys ever! :) Brody and I took a little trip to Jo-Ann fabric and crafts yesterday because I was in the crafty mood and he's always there. I swear, my sister has done such a great job getting Brody into crafts and art. She's so creative! I knew I had to do something Easter related (although I was tempted to do something golf-related since it's Master's week here, but all I could think of were golf ball cake pops and I need a little break from the baked goods) and it also had to be something fun for a soon-to-be 3-year-old. When in doubt, I shrinky-dink!

If you've never heard of these before, they rock! I love them. Basically you draw, print, paint your design onto a big transparent sheet of plastic and then stick it in the oven to shrink. It's so cool! 

Brody liked the beads at the store so I thought...there must be a way to combine the two...

Presenting the "Hoppy Easter Mini Banner!"

We're going to break this up into two segments: Do During Naptime and Do With the Nugget (that's what I call anyone under 5 years old...they're all little nuggets)

Here we go...supplies:

  • Hole Puncher
  • Colored Pencils
  • Scissors
  • Shrinky Dink Paper (any brand) either clear or matte
  • Parchment Paper or vellum
  • Baking sheet
  • Beads
  • Some sort of lanyard or ribbon or hefty string to hang things from
  • Sharpie
  • Sand Paper (only if you purchased the clear paper)

Do During Naptime
First, determine how big you want your eggs to be. Then trace them and cut them out. I accidentally bought the clear paper and colored pencils. These two don't mix so you have to rough up the paper with a bit of 400 grit sandpaper. If you bought matte or if you want to use permanent markers or paints, you can skip this step. Paint would actually have been super fun for Brody but I didn't think about it until we'd left the store already! Oops! 


Write your letters on the eggs. In order for them to show up correctly, you have to write them backwards. I did NOT find this easy! I thought I could do it, no sweat, but I guess I'm not quite as quick as I thought I was... I thought I'd go ahead and have this done before Brody woke up so that he didn't have to wait for them to be ready and I could also make sure that they were perfect...I'm kind of a control freak. 

Punch holes in the top so that you can hang them from the string. It is very important that you do this before you shrink them! 

Do With the Nugget
Once your little ball of energy wakes up, you can have some fun with them! Get out the colored pencils and let them have fun! Make sure they color on the correct side of the egg and that they bear down pretty hard. I had to let go of my controlling nature and let Brody do his thing here. He did a great job though!

Now, preheat the oven to 330 degrees and place a sheet of vellum paper or parchment paper on the baking sheet. Place your eggs on the baking sheet and make sure they don't overlap. 

Once the oven is hot, you can put your sheet in there. Brody LOVED watching this. It only takes about 2-3 minutes for them to shrink. It's pretty cool to watch them do it, too. They curl up a bit but eventually flatten out. I so LOVED watching his face light up while they shrank! (and my sister's friend, Helen, enjoyed it too! haha)

After they've stopped shrinking, pull them out. If they're still curled a little, flatten them with a spatula or piece of cardboard. Let them cool. 

Tie a knot in the end of the string and start placing some beads on there. I did 5 as spacers between words and 3 in between each letter. I let Brody pick each and every bead. He's very particular so he enjoyed this bit as well. As he handed each one to me, I slid it on. When it came time to place the eggs, I threaded them in the same way each time and tied a knot when it was at the right place so it hung facing forward. 
This is the size difference after they shrink. So CUTE!

Keep going until you're finished. Tie a loop at the each end of the string and you're ready to hang it up! :)  

I know this isn't fine art or anything that ground breaking, but it was fun and kid-friendly! 

Tuesday, March 29, 2011

It's Good to be the King

I love making cakes! It's by far my new favorite thing to do, so I jumped at the opportunity to make a cake for my friend Ben's 34th birthday!

Ben loves Crown Royal. Ben loves a lot of other things too, but one of the first things I found out about him was how much he loves Crown Royal. Therefore, when Ben's wife, Phyllis, called and asked me if I had any creative ideas for his birthday, I immediately googled "Crown Royal cake" and came up with my own plan of action.

First I made 2 cakes (red velvet mix, cream cheese icing- this is his favorite icing flavor and I always like to pair it with red velvet cake...) and let them cool. Because I have a crappy apartment and a crappy oven and really crappy cake pans, the cakes came out a LITTLE lopsided. By a little I mean a LOT! (side note...now would be a perfect time for SOMEONE to save up for some nice cake pans...or a house...unless you're saving for something else...

sigh.

fine. cake pans it is)

Anyway, luckily for me, I was able to put the thin side of one on the thick side of the other and it ended up more or less level. With a thin layer of icing in the middle it looked pretty great. Then I eyeballed the shape of a Crown Royal bottle. It wasn't that hard, but if you're nervous, print out an image and cut around. Cover it with icing to crumb coat and prepare for the fondant.

Here comes the fun part! And boy oh boy am I glad Evan was there to help with this part.

I was trying to be cost conscious, so I bought white fondant and some candy coloring. I used this instead of icing coloring because it's not water based and using water-based food coloring in fondant can cause it to break down and soften, rendering it useless. I played with some colors (creating a very unsuccessful brown that is not suitable for human eyes) until I got the proper brown for the bottle, yellow for the cap and purple for the bag. This takes quite a bit of lower arm strength and your hands will get discolored and cuticles will look like crap for a while. Thanks for the help, Evan!

I rolled them out (pretty thick for the bottle so you can make lines in it like on the bottle--the rest pretty thin) and placed them on the cake. First the brown over the entire bottle. Smooth. Then the label in white. Brush a small amount of water on the back of the label and place on the cake. Repeat with the cap and band around the cap.

Here comes that iconic purple bag. I had fun with this one! I played around with it a few times before getting it perfect. I rolled it out, folded part of the top over so it looked like the section where the tie goes. Then I kinda gathered it up like folds in fabric and placed it on the cake. But I forgot to put water down first. So I held the folds in place and picked up sections and brushed water on the area under and placed it gently back down. I also used some extra yellow to make the cording. I rolled it out kindergarten snake style and twisted them together.

I had already gotten Evan to wrap it in plastic wrap but we took a picture of what it should look like thus far...


The next day I painted on the details by combining lusterdust and clear vanilla extract into little paint buckets. I brushed the gold paint onto the label and the cap and ties, bronze onto the bottle and purple onto the bag. I added a little food coloring (because I was too lazy to go to Michael's AGAIN to get more luster dust in the right colors) and it worked out pretty well but a little runny. I made red and purple for the details on the label. I also used the gold luster dust to write Ben's name on the bag and add some details. Here's a hint with that one though, maybe try writing the name on the bag BEFORE you put it on the cake because it was really difficult to do it after. Anyway, sorry for glossing over the last details, but you can be creative after you get the basic shape done. Here's what the finished product looked like. The lighting is quite a bit different, but you get the idea!


Hopefully will have some pics of people enjoying the cake later! :) I really should have taken my own pictures this time, but I had a little bit going on. 

OH! Forgot to mention that for party favors, I made the same oreo truffle recipe from before but did them as pops and just went with purple candy coating. Added some edible confetti with some corn syrup to make it a little more glittery. Then Evan bagged them up and I tied purple ribbons around them and BAM! All done! :) 

Happy Birthday, Ben! Hope it was the best day ever!